Step-by-Step: Simple Video App using the Native SDK for Android
In this topic, you will use Android Studio and the Brightcove Player SDK for Android to create an app which plays a video from a Brightcove Video Cloud account, as well as videos from a Brightcove Video Cloud playlist.
Overview
After completing this Quick Start you should be able to:
Create a project and add the Brightcove Player SDK for Android using Gradle.
Alter the layout to include a BrightcoveExoPlayerVideoView.
Add to the onCreate() method to play videos. from different sources.
Audience
Developers who use Android Studio for development and are interested in using the Brightcove Player SDK for Android in an Android app.
Prerequisites
A minimal knowledge of Java and Android app development.
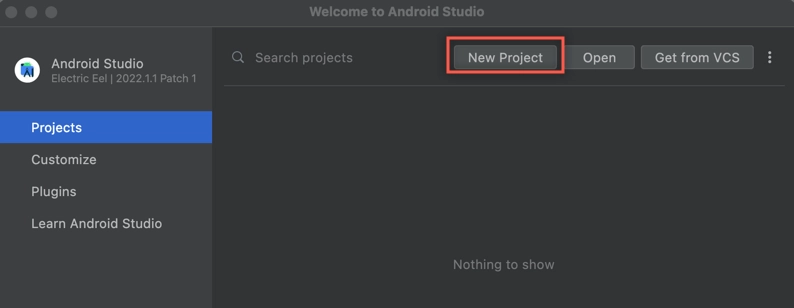
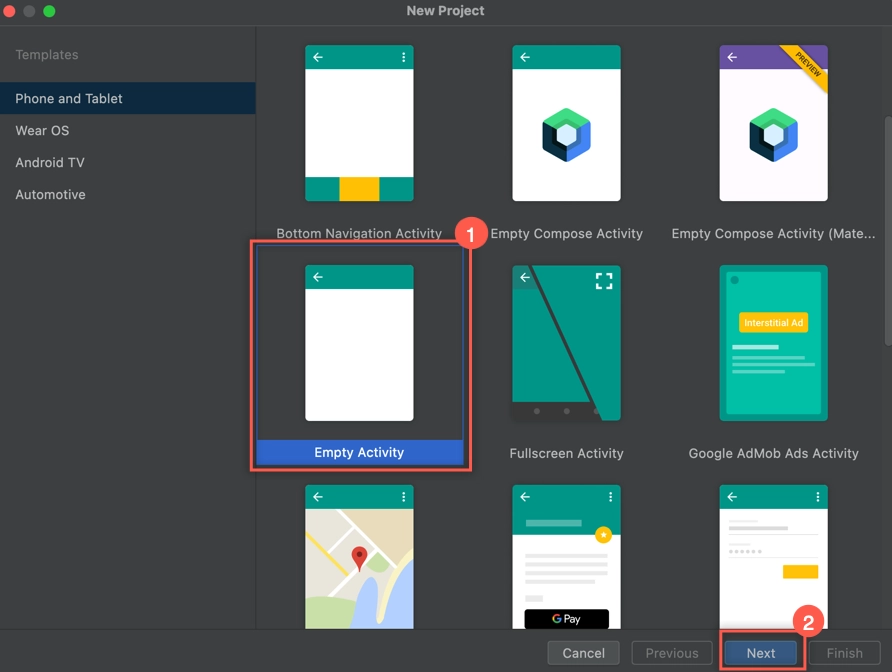
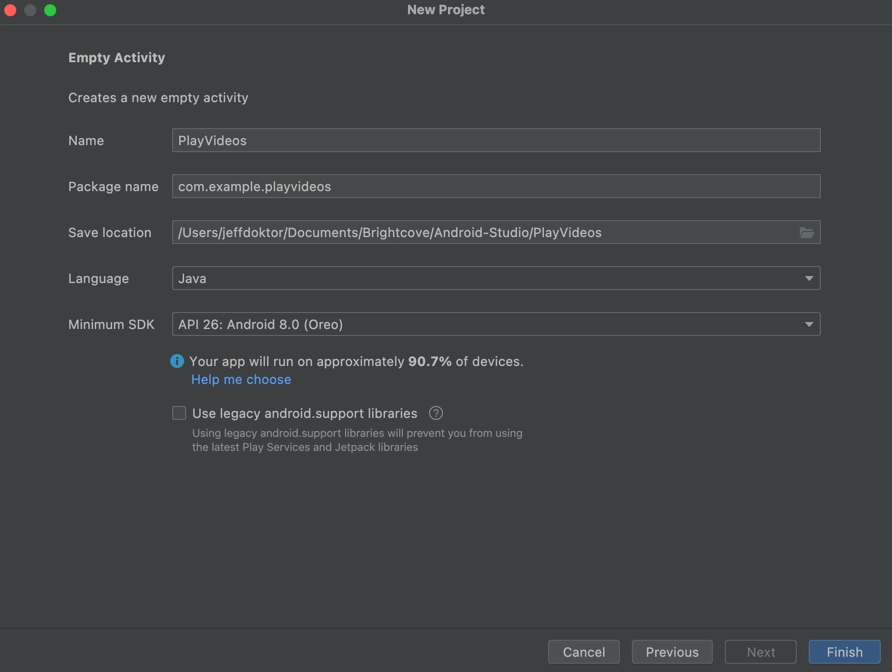
Get ready
Get ready for development by installing Android Studio
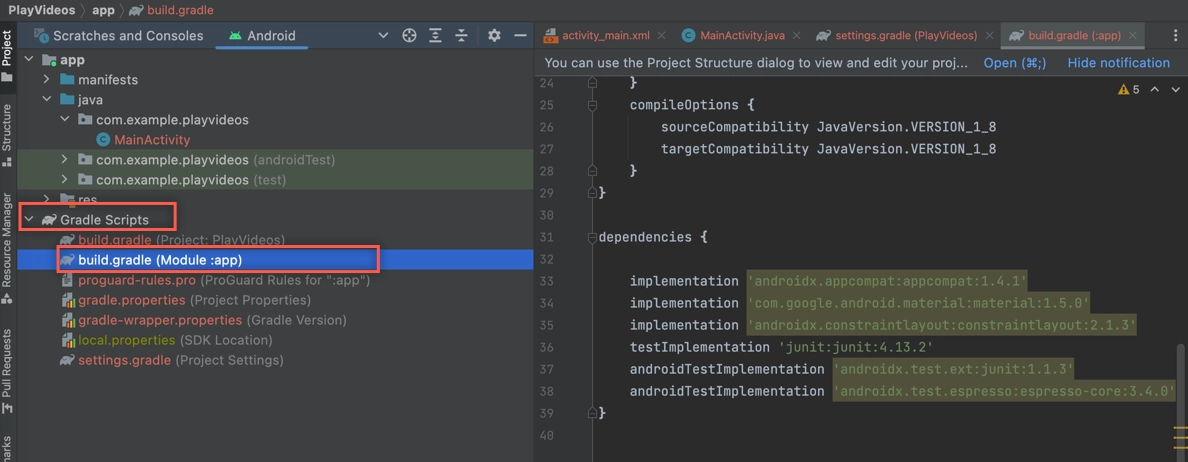
In the Gradle Scripts group, open the build.gradle file associated with the current module in your PlayVideos project.
Build gradle file
In the build.gradle file, locate the dependencies section. Include the latest version of the Native SDK for Android. Replace the value 8.0.0 below with the latest SDK version, which can be found in the Overview: Brightcove Native SDK for Android document.
Using a dynamic dependency version with the '+' character is discouraged in the Gradle community. Using dynamic versioning brings a significant risk to your build process, as newer APIs may become unexpectedly incompatible with your app's source code.
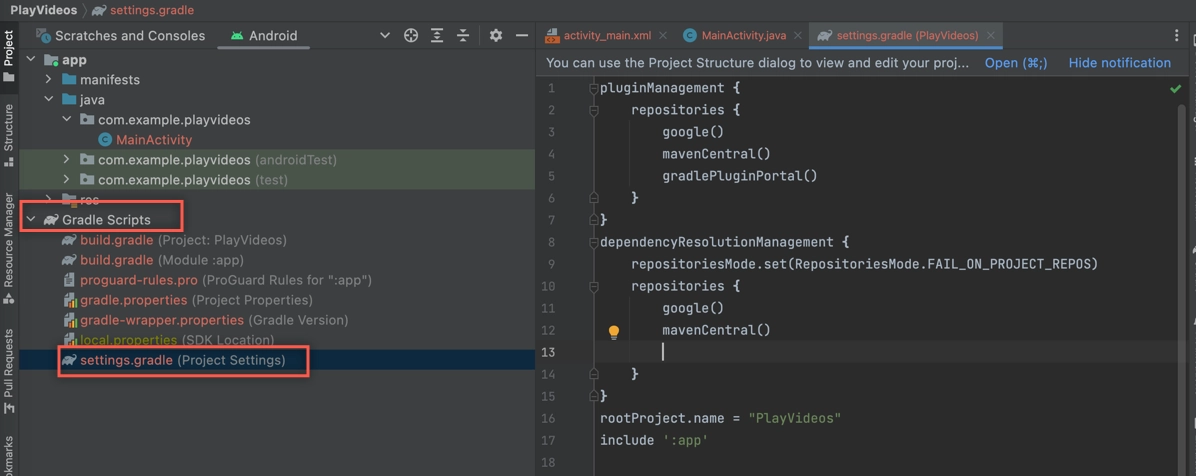
Downgrade Gradle to v7.1.3 by changing in the build.gradle(PlayVideos) file In the Gradle Scripts.
        plugins {
          id 'com.android.application' version '7.1.3' apply false
          }
And in the gradle-wrapper.properties file In the Gradle Scripts.
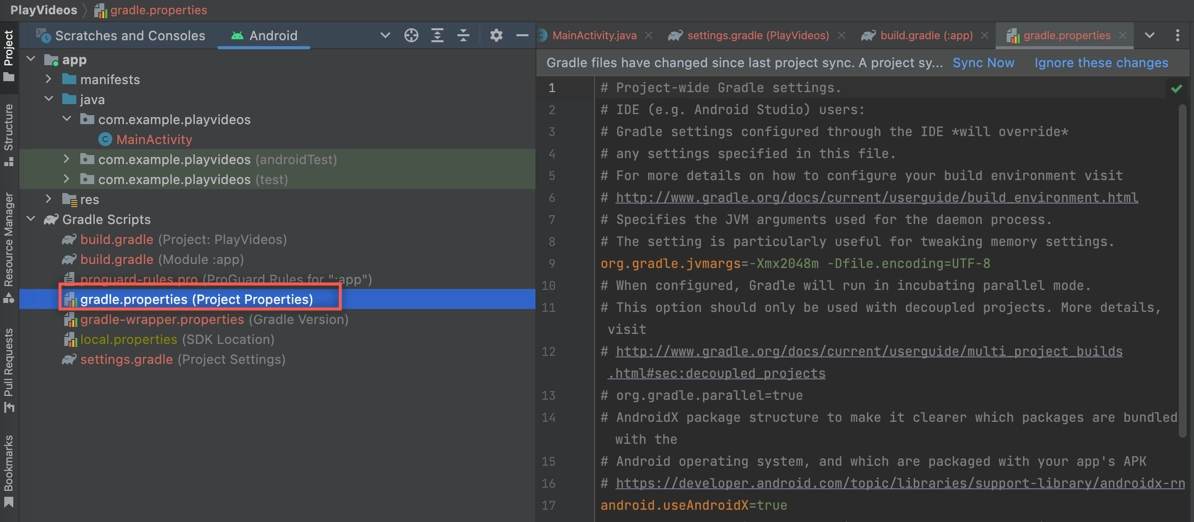
Sync the project to pick up the Gradle file changes.
Code the application
Next, you will write the code to layout the app, build the video list, and play the videos
Define the app's layout
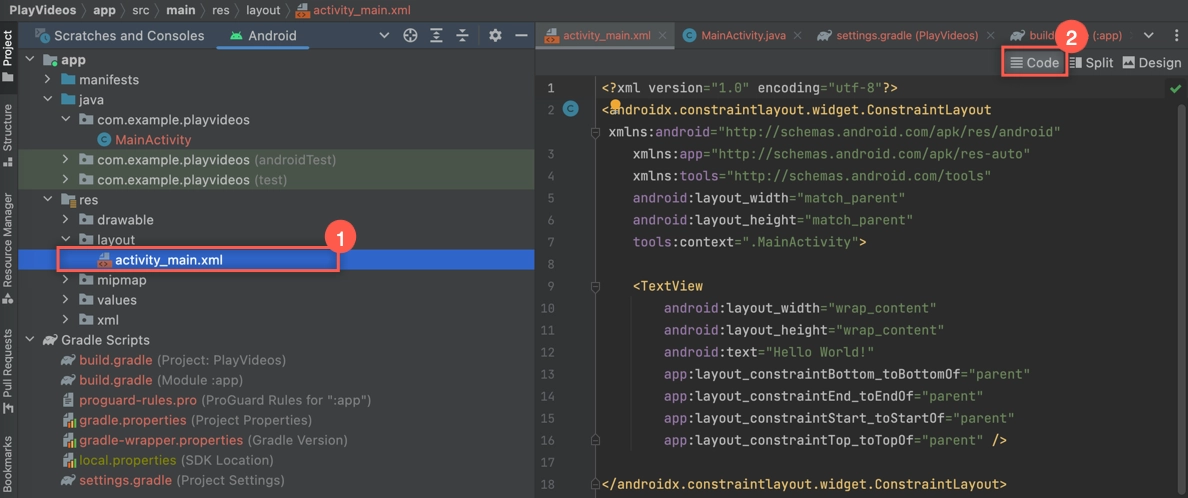
Even with the Empty Activity, you will get a simple TextView layout. Replace this with the BrightcoveExoPlayerVideoView, which defines the view for the player.
Open the file app/res/layout/activity_main.xml and click Code.
Layout XML file
Remove the existing TextView element and add a BrightcoveExoPlayerVideoView section so the resulting XML appears as follows. Note for later use that the id of the view is named brightcove_video_view.
Sync the project to rebuild it and pick up these changes.
Create the View and play a video
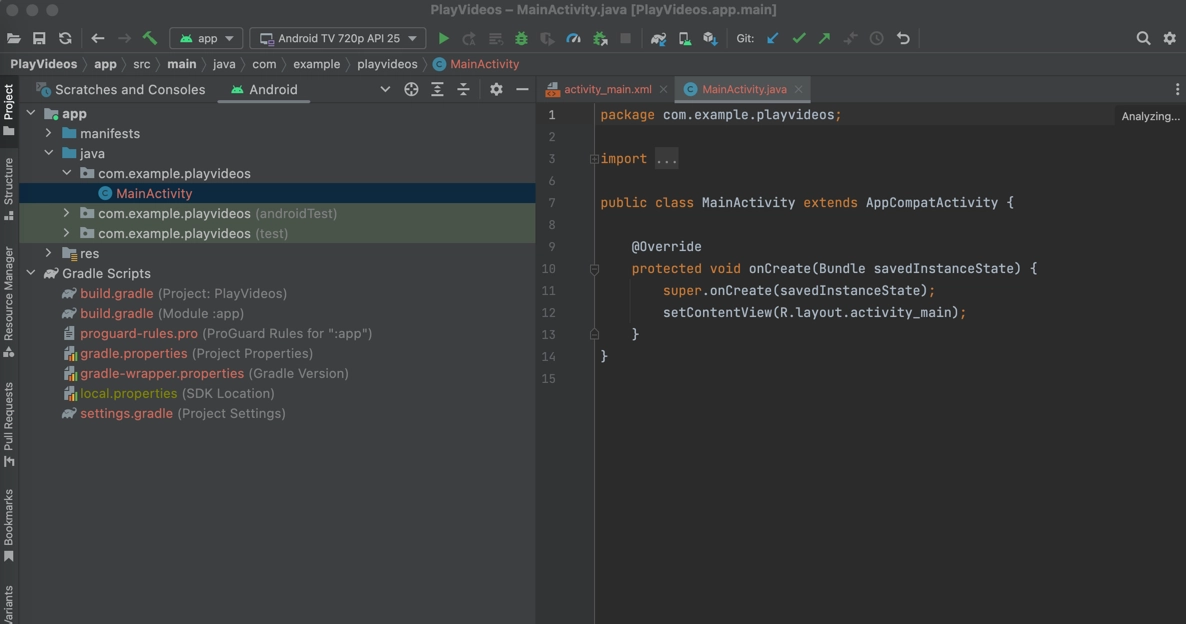
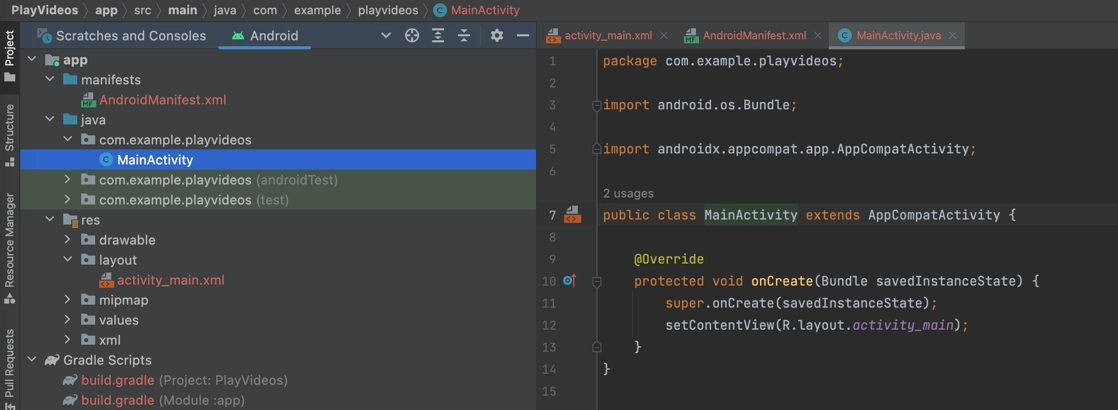
Return to the MainActivity.java file.
MainActivity file
For the MainActivity class, extend the BrightcovePlayer class. This provides default lifecycle management for your app.
public class MainActivity extends BrightcovePlayer {
As you start typing BrightcovePlayer, you should see options to select. Double clicking on the BrightcovePlayer option will add an import statement.
BrightcovePlayer class
Locate the onCreate() function. Before entering the superclass, assign the brightcoveVideoView as follows:
Create an instance of BrightcoveExoPlayerVideoView and associate it with the layout. In most cases, you will use the exoplayer view. For details, see the Choosing a Video View document.
When extending the BrightcovePlayer, we must assign the brightcoveVideoView before entering the superclass. This allows for some stock video player lifecycle management.
public class MainActivity extends BrightcovePlayer {
  @Override
  protected void onCreate(Bundle savedInstanceState) {
    setContentView(R.layout.activity_main);
    brightcoveVideoView = (BrightcoveExoPlayerVideoView) findViewById(R.id.brightcove_video_view);
    super.onCreate(savedInstanceState);
When you paste in the highlighted code above, press the option + return keys to add the import statement for the BrightcoveExoPlayerVideoView class.
Next, you need to send your Brightcove Player Account ID to Brightcove using the analytics setAccount() method.
Optional: If you override the BrightcoveExoPlayerVideoView class or do not use the Brightcove player and catalog, you need to send your Video Cloud Publisher ID to Video Cloud Analytics. You can do this by using the analytics setAccount() method. This allows you to view data for this app in Video Cloud Analytics.
package com.brightcove.playvideos;
import android.os.Bundle;
import com.brightcove.player.model.DeliveryType;
import com.brightcove.player.model.Video;
import com.brightcove.player.view.BrightcoveExoPlayerVideoView;
import com.brightcove.player.view.BrightcovePlayer;
import java.net.URISyntaxException;
public class MainActivity extends BrightcovePlayer {
@Override
protected void onCreate(Bundle savedInstanceState) {
setContentView(R.layout.activity_main);
// Create the video view
brightcoveVideoView = (BrightcoveExoPlayerVideoView) findViewById(R.id.brightcove_video_view);
super.onCreate(savedInstanceState);
// Optional: For Brightcove Player customers to register their apps
Analytics analytics = brightcoveVideoView.getAnalytics();
analytics.setAccount("your account Id");
// Define a video from a remote server
Video video = Video.createVideo("https://sdks.support.brightcove.com/assets/videos/hls/greatblueheron/greatblueheron.m3u8",
  DeliveryType.HLS);
// Load a remote poster image
try {
  java.net.URI myposterImage = new java.net.URI("https://sdks.support.brightcove.com/assets/images/general/Great-Blue-Heron.png");
  video.getProperties().put(Video.Fields.STILL_IMAGE_URI, myposterImage);
} catch (URISyntaxException e) {
  e.printStackTrace();
}
// Add video to the view
brightcoveVideoView.add(video);
// Start video playback
brightcoveVideoView.start();
}
}
Run or debug the application to see the video playing.
Get and play a video
In this section, you will use the Catalog class to retrieve a single video from the Video Cloud server, then play it.
The com.brightcove.player.edge.Catalog class provides asynchronous methods for retrieving videos and playlists from the Brightcove Playback API. This is the latest and recommended API to retrieve content from your Video Cloud library.
Remove unneeded code
Some code from the previous app is no longer needed. In the onCreate() method, remove all code after you enter the superclass.
Confirm your onCreate() method appears as follows:
public class MainActivity extends BrightcovePlayer {

  @Override
  protected void onCreate(Bundle savedInstanceState) {
    setContentView(R.layout.activity_main);
    // Create the video view
    brightcoveVideoView = (BrightcoveExoPlayerVideoView) findViewById(R.id.brightcove_video_view);

    super.onCreate(savedInstanceState);

  }
}
Retrieve a video from the Catalog
From your Video Cloud Studio account, collect the following information:
Account ID
Video ID
Policy Key
Define your custom values in your project. Open the res/values/strings.xml file and update it with your values:
<?xml version="1.0" encoding="utf-8"?>
  <resources>

      <!-- Application name -->
      <string name="app_name">PlayVideos</string>

      <!-- A sample Brightcove Edge Account ID -->
      <string name="account">your account id</string>

      <!-- A sample Brightcove Edge Policy Key -->
      <string name="policy">your policy key</string>

      <!-- A sample Brightcove Video ID -->
      <string name="videoId">your video id</string>

  </resources>
Return to the MainActivity.java file and get the event emitter from the SDK.
// Get the event emitter from the SDK
EventEmitter eventEmitter = brightcoveVideoView.getEventEmitter();
Create a catalog request to fetch a video from the Brightcove Edge service, using your defined values for Account ID and Policy Key from the previous step.
// Create a catalog request to fetch a video
String account = getString(R.string.account);
Catalog catalog = new Catalog.Builder(eventEmitter, account)
  .setBaseURL(Catalog.DEFAULT_EDGE_BASE_URL)
  .setPolicy(getString(R.string.policy))
  .build();
Use the Catalog's findVideoByID() method with your video ID and a VideoListener for the callback.
In the onVideo() method, add the video to brightcoveVideoView, then start the video.
// Get the video by ID
catalog.findVideoByID(getString(R.string.videoId), new VideoListener() {

  @Override
  public void onVideo(Video video) {
    // Add video to the view
    brightcoveVideoView.add(video);
    // Start video playback
    brightcoveVideoView.start();
  }
});
The complete code for your MainActivity class should be similar to this:
public class MainActivity extends BrightcovePlayer {

  @Override
  protected void onCreate(Bundle savedInstanceState) {
    setContentView(R.layout.activity_main);
    // Create the video view
    brightcoveVideoView = (BrightcoveExoPlayerVideoView) findViewById(R.id.brightcove_video_view);

    super.onCreate(savedInstanceState);

    // Get the event emitter from the SDK
    EventEmitter eventEmitter = brightcoveVideoView.getEventEmitter();

    // Create a catalog request to fetch a video
    String account = getString(R.string.account);
    Catalog catalog = new Catalog.Builder(eventEmitter, account)
      .setBaseURL(Catalog.DEFAULT_EDGE_BASE_URL)
      .setPolicy(getString(R.string.policy))
      .build();

    // Get the video by ID
    catalog.findVideoByID(getString(R.string.videoId), new VideoListener() {

      @Override
      public void onVideo(Video video) {
        // Add video to the view
        brightcoveVideoView.add(video);
        // Start video playback
        brightcoveVideoView.start();
      }
    });
  }
}
Run the app to confirm the video plays.
Get and play a playlist
In this section, you will use the Catalog class to retrieve a playlist from the Video Cloud server, then play the videos in the playlist.
The com.brightcove.player.edge.Catalog class provides asynchronous methods for retrieving videos and playlists from the Brightcove Playback API. This is the latest and recommended API to retrieve content from your Video Cloud library.
Remove unneeded code
Some code from the previous app is no longer needed. Remove the call to the Catalog's findVideoByID() method, and the associated VideoListener anonymous callback function.
// Get the video by ID
catalog.findVideoByID(getString(R.string.videoId), new VideoListener() {

  @Override
  public void onVideo(Video video) {
    // Add video to the view
    brightcoveVideoView.add(video);
    // Start video playback
    brightcoveVideoView.start();
  }
});
Retrieve a playlist from the Catalog
The existing catalog instance will work for retrieving a playlist, so no changes are necessary to these lines of code:
// Get the event emitter from the SDK
EventEmitter eventEmitter = brightcoveVideoView.getEventEmitter();

// Create a catalog request to fetch a video
String account = getString(R.string.account);
Catalog catalog = new Catalog.Builder(eventEmitter, account)
  .setBaseURL(Catalog.DEFAULT_EDGE_BASE_URL)
  .setPolicy(getString(R.string.policy))
  .build();
In Video Cloud Studio's Media module, select a playlist and copy the Playlist ID.
Open the res/values/strings.xml file and add an entry for your playlist ID:
  <?xml version="1.0" encoding="utf-8"?>
    <resources>

        <!-- Application name -->
        <string name="app_name">PlayVideos</string>

        <!-- A sample Brightcove Edge Account ID -->
        <string name="account">your account id</string>

        <!-- A sample Brightcove Edge Policy Key -->
        <string name="policy">your policy key</string>

        <!-- A sample Brightcove Playlist ID -->
        <string name="playlistId">your playlist id</string>

    </resources>
Use the Catalog's findPlaylistByID() method using your playlist ID and a PlaylistListener for the callback.
In the onPlaylist() method, retrieve the videos from the playlist, add all of the videos to brightcoveVideoView, then start the first video.
// Get the playlist by ID
String playlist = getString(R.string.playlistId);
catalog.findPlaylistByID(playlist, new PlaylistListener() {
  @Override
  public void onPlaylist(Playlist playlist) {
    // Add playlist to the view
    brightcoveVideoView.addAll(playlist.getVideos());
    // Start playback
    brightcoveVideoView.start();
  }
});
The complete code for your MainActivity class should be similar to this:
public class MainActivity extends BrightcovePlayer {

  @Override
  protected void onCreate(Bundle savedInstanceState) {
    setContentView(R.layout.activity_main);
    // Create the video view
    brightcoveVideoView = (BrightcoveExoPlayerVideoView) findViewById(R.id.brightcove_video_view);

    super.onCreate(savedInstanceState);

    // Get the event emitter from the SDK
    EventEmitter eventEmitter = brightcoveVideoView.getEventEmitter();

    // Create a catalog request to fetch a video
    String account = getString(R.string.account);
    Catalog catalog = new Catalog.Builder(eventEmitter, account)
      .setBaseURL(Catalog.DEFAULT_EDGE_BASE_URL)
      .setPolicy(getString(R.string.policy))
      .build();

    // Get the playlist by ID
    String playlist = getString(R.string.playlistId);
    catalog.findPlaylistByID(playlist, new PlaylistListener() {
      @Override
      public void onPlaylist(Playlist playlist) {
        // Add playlist to the view
        brightcoveVideoView.addAll(playlist.getVideos());
        // Start playback
        brightcoveVideoView.start();
      }
    });
  }
}
Run the app to confirm multiple videos from the playlist play.
You're done! Thanks for working through the Android SDK Quick Start.