Overview
This example plays a video returned from the Brightcove Playback API, which is the latest and recommended API to retrieve content from your Video Cloud library.
For this option, you will need a Policy Key. If you are not familiar with Policy Keys, see Policy API Overview.
Get started
This example plays videos from an internal array of video files.
Follow the steps below to get familiar with setting up an app project that uses the Brightcove Player SDK for iOS. You can view the complete code for each of the following:
There are two ways to try out this sample:
Download the sample
Download the entire Xcode project for experimentation.
- Clone or download the Native SDK for iOS samples to your local system.
- Navigate to the Player/VideoCloudBasicPlayer/objc sample app.
- Run the
pod installcommand. - Open and run the newly created workspace.
For details, see the Running Sample Apps for the Native SDK for iOS/tvOS document.
Build the app by following the steps in this guide
Follow the steps below to get familiar with setting up an app project that uses the Brightcove Player SDK for tvOS. You can view the complete code for each of the following:
Create the project
Set up a project in Xcode. Then add the Brightcove Player SDK along with any dependencies to the project.
Set up the Xcode project
Create a new Xcode project for the app.
-
Start the creation of a new iOS project in Xcode. Select Create a new Xcode project. Alternatively, in the Xcode top menu, you can select File, New, Project.
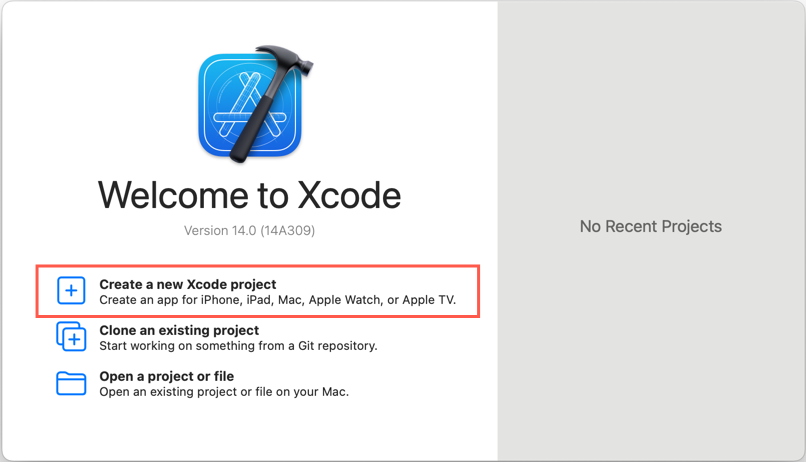
Create Project -
Choose App for the template and click Next.
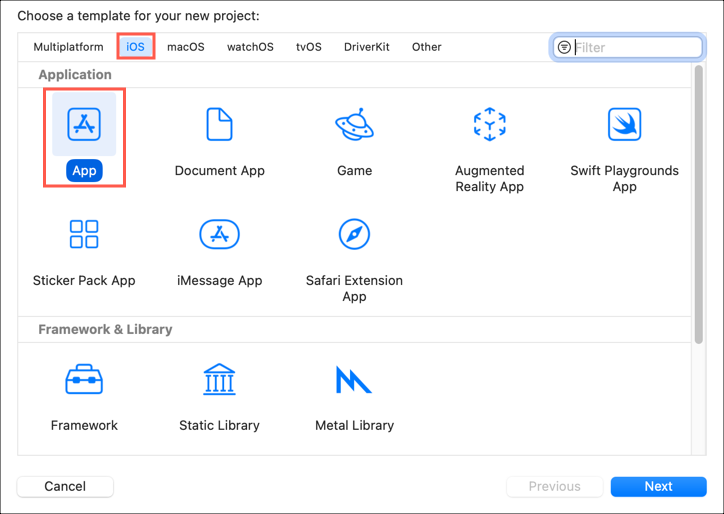
Choose project template -
Set the project information as follows:
- Product Name: Simple-Video-Playback
- Team: none
The Team field is optional. If you want to distribute your app on the App Store, you will need to select a team that you belong to through the Apple Developer Program. The team name is required for code signing. In this example, we'll select none.
- Organization Identifier: com.example-company
This makes the product name unique for the app store. - Interface: Storyboard
- Language: Objective-C
Click Next.
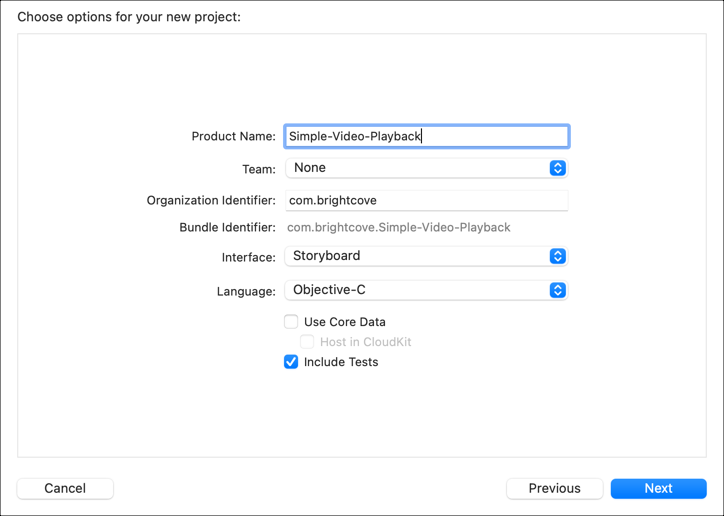
Add project information -
Choose the location where you want to save your project and click Create.
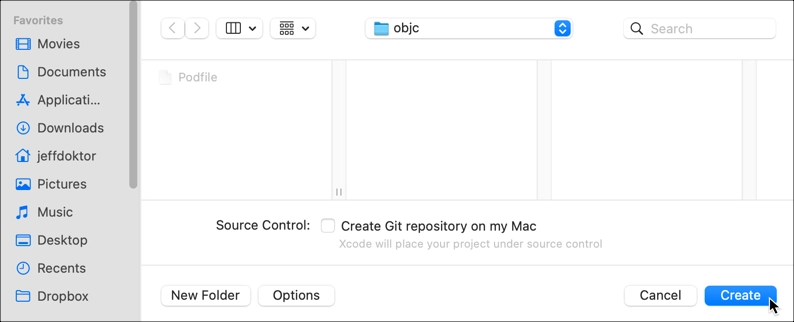
Save project - Now close the project (yes, close it — this is important!)
Add the SDK with Swift Package Manager (recommended)
The recommended way to add the Brightcove Native SDK for iOS to your project is the Swift Package Manager:
- In Xcode, choose File > Add Package Dependencies.
- Paste the package URL:
https://github.com/brightcove/brightcove-player-sdk-ios - Select the
BrightcovePlayerSDKlibrary product, then continue with the rest of this tutorial.
Add the SDK and its dependencies to your project
The easiest way to add the SDK and its dependencies to your project is to use CocoaPods.
CocoaPods is a dependency manager that adds libraries to your project. It is not required, but makes installation easier. To install CocoaPods, see the instructions on the CocoaPods site.
-
In your project folder, create a plain text file called Podfile (no file extension).
-
Using a text editor, add the following lines of code to the Podfile and save it. This code does the following:
- Line 1: Points to the GitHub location for the CocoaPods pod specs
- Line 2: Points to the GitHub location for the Brightcove pod specs
- Line 4: Defines the iOS platform version
- Line 6: Sets Pods to use frameworks instead of static libraries
-
Lines 8-10: Install the Brightcove Native Player SDK
- For more information about managing dependencies, see the How To Manage Dependencies With CocoaPods article.
source 'https://github.com/CocoaPods/Specs.git' source 'https://github.com/brightcove/BrightcoveSpecs.git' platform :ios, '16.0' use_frameworks! target 'Simple-Video-Playback' do pod 'Brightcove-Player-Core/XCFramework' end -
Open a Terminal session and navigate to your Simple-Video-Playback Xcode project folder.
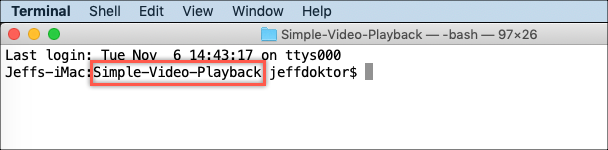
Terminal session -
In the Terminal session, type the following command:
pod installand press Return to run the it. You should see a series of messages in the terminal indicating that the Brightcove Player SDK has been added to your project.
-
The
pod installcommand creates the.xcworkspacefile for your project.Notice the last line, which is important — from this point on, you must do the following:
- Open the Simple-Video-Playback.xcworkspace file in Xcode
- Do not use the Simple-Video-Playback.xcodeproj file
Code the video app
Create the code for a simple video playback app.
- In Xcode, open the Simple-Video-Playback.xcworkspace file.
Set the audio behavior for the app
The audio session handles audio behavior at the app level. Learn more about the AVAudioSession class.
For this sample, we will use AVAudioSessionCategoryPlayback. This plays audio even when the screen is locked and with the Ring/Silent switch set to silent. To keep it simple, we will put the code for this in the App Delegate.
-
In your project, open the App Delegate implementation file (AppDelegate.m).
-
In the
didFinishLaunchingWithOptionsmethod, add code to set the audio session category. Make sure you import theAVFoundationframework.- We need the code below in order to ensure that audio plays back when we expect it to. For example, without setting this code, we won't hear the video when the mute switch is on.
- For simplicity in the sample, we are putting this in the app delegate. For more information about how to use this in your own app, see the Audio Session Programming Guide.
//
//  AppDelegate.m
//  Simple-Video-Playback
//

#import "AppDelegate.h"
#import <AVFoundation/AVFoundation.h>

@interface AppDelegate ()
@end

@implementation AppDelegate

- (BOOL)application:(UIApplication *)application didFinishLaunchingWithOptions:(NSDictionary *)launchOptions {
    // Override point for customization after application launch.
    NSError *categoryError = nil;
    BOOL success = [[AVAudioSession sharedInstance] setCategory:AVAudioSessionCategoryPlayback error:&categoryError];

    if (!success)
    {
        NSLog(@"AppDelegate Debug - Error setting AVAudioSession category.  Because of this, there may be no sound. `%@`", categoryError);
    }
    return YES;
}

#pragma mark - UISceneSession lifecycle

- (UISceneConfiguration *)application:(UIApplication *)application configurationForConnectingSceneSession:(UISceneSession *)connectingSceneSession options:(UISceneConnectionOptions *)options {
    // Called when a new scene session is being created.
    // Use this method to select a configuration to create the new scene with.
    return [[UISceneConfiguration alloc] initWithName:@"Default Configuration" sessionRole:connectingSceneSession.role];
}

- (void)application:(UIApplication *)application didDiscardSceneSessions:(NSSet<UISceneSession *> *)sceneSessions {
    // Called when the user discards a scene session.
    // If any sessions were discarded while the application was not running, this will be called shortly after application:didFinishLaunchingWithOptions.
    // Use this method to release any resources that were specific to the discarded scenes, as they will not return.
}
@end
Build the View Controller implementation
Update the View Controller implementation to play a video from the Brightcove catalog service.
-
In your project, open the View Controller implementation file (ViewController.m).
Import the Brightcove Player SDK header file
-
Add the following import statement for the Brightcove Player SDK:
@import BrightcovePlayerSDK;
Customize the project with your values
Add token and playlist id values to access your Video Cloud account.
This example plays a video returned from the Brightcove Playback API, which is the latest and recommended API to retrieve content from your Video Cloud library. If you are not familiar with Policy Keys, see the Policy API Overview.
-
Below the
#importdirectives, add your own values for the following:- Line 11: Defines your Brightcove Playback API Policy Key.
- Line 12: Defines your Video Cloud Account ID.
- Line 13: Defines your Video Cloud Video ID.
// ** Customize these values with your own account information **
static NSString * const kViewControllerPlaybackServicePolicyKey = @"your policy key";
static NSString * const kViewControllerAccountID = @"your account id";
static NSString * const kViewControllerVideoID = @"your video id";
Declare properties
-
In the ViewController interface section, add the following class declarations:
- Line 14: Adds the Brightcove delegates to the
interface. This allows your app to listen and respond to video playback events. - Line 16: Defines the
BCOVPlaybackServiceclass, which provides asynchronous methods for retrieving data from the Playback API. - Line 17: Defines the
BCOVPlaybackController, which has methods to control playback functionality. - Line 18: Defines the player view for the Brightcove UI controls.
- Line 19: Defines the video container view.
@interface ViewController () <BCOVPlaybackControllerDelegate> @property (nonatomic, strong) BCOVPlaybackService *playbackService; @property (nonatomic, strong) id<BCOVPlaybackController> playbackController; @property (nonatomic) BCOVPUIPlayerView *playerView; @property (nonatomic, weak) IBOutlet UIView *videoContainer; @end - Line 14: Adds the Brightcove delegates to the
Define initialization method
-
In the ViewController implementation section, define an
initfunction which calls asetupfunction which you will define in the next step.@implementation ViewController #pragma mark Setup Methods - (instancetype)initWithCoder:(NSCoder *)coder { self = [super initWithCoder:coder]; if (self) { [self setup]; } return self; }
Set up the player
-
Below the
initfunction, create a function namedsetup, which is called when the app loads.- Line 38: Uses the shared manager to create a playback controller. The
BCOVPlayerSDKManagerclass is a singleton that allows you to create other objects in the SDK ecosystem. -
Line 40: Optional: If you override the
BCOVVideoclass or do not use the Brightcove player and playback service or catalog, you need to send your Video Cloud Account ID to Video Cloud Analytics. This allows you to view data for this app in Video Cloud Analytics. - Lines 42-44: set the delegate and turn on the autoadvance and autoplay features.
-
Line 46: Initializes the playback service with your Account ID and Policy Key.
- (void)setup { _playbackController = [BCOVPlayerSDKManager.sharedManager createPlaybackController]; _playbackController.analytics.account = kViewControllerAccountID; // Optional _playbackController.delegate = self; _playbackController.autoAdvance = YES; _playbackController.autoPlay = YES; _playbackService = [[BCOVPlaybackService alloc] initWithAccountId:kViewControllerAccountID policyKey:kViewControllerPlaybackServicePolicyKey]; } - Line 38: Uses the shared manager to create a playback controller. The
Configure the player
-
In the
viewDidLoadfunction do the following:- Line 54: Create and set the Brightcove player controls, using the standard VOD layout.
- Line 56: Adds the player view as a subview of the main view.
- Line 57: Turn off auto-resizing mask.
- Lines 58-63: Use Auto Layout to define dynamic contraints for the player view.
- Lines 64: Assigns the player view to its associated global variable.
- Lines 67: Associates the player view with the playback controller.
-
Line 69: Calls the
requestContentFromPlaybackServicefunction, which you will define in the next step.
- (void)viewDidLoad { [super viewDidLoad]; // Do any additional setup after loading the view, typically from a nib. // Set up our player view. Create with a standard VOD layout. BCOVPUIPlayerView *playerView = [[BCOVPUIPlayerView alloc] initWithPlaybackController:self.playbackController options:nil controlsView:[BCOVPUIBasicControlView basicControlViewWithVODLayout] ]; _videoContainer addSubview:playerView]; playerView.translatesAutoresizingMaskIntoConstraints = NO; [NSLayoutConstraint activateConstraints:@[ [playerView.topAnchor constraintEqualToAnchor:_videoContainer.topAnchor], [playerView.rightAnchor constraintEqualToAnchor:_videoContainer.rightAnchor], [playerView.leftAnchor constraintEqualToAnchor:_videoContainer.leftAnchor], [playerView.bottomAnchor constraintEqualToAnchor:_videoContainer.bottomAnchor], ]]; _playerView = playerView; // Associate the playerView with the playback controller. _playerView.playbackController = _playbackController; [self requestContentFromPlaybackService]; }
Request content from the Brightcove library
In order to play back video content, you will request a video from your Video Cloud library.
-
Below the
viewDidLoadfunction, create a function namedrequestContentFromPlaybackServiceas follows:- (void)requestContentFromPlaybackService { NSDictionary *configuration = @{kBCOVPlaybackServiceConfigurationKeyAssetID:kViewControllerVideoID}; [self.playbackService findVideoWithConfiguration:configuration queryParameters:nil completion:^(BCOVVideo *video, NSDictionary *jsonResponse, NSError *error) { if (video) { [self.playbackController setVideos:@[ video ]]; } else { NSLog(@"ViewController Debug - Error retrieving video playlist: `%@`", error); } }]; }
View the code
The View Controller implementation is now complete. Here is the full code:
//
// ViewController.m
// Simple-Video-Playback
//
#import "ViewController.h"
@import BrightcovePlayerSDK;
// ** Customize these values with your own account information **
static NSString * const kViewControllerPlaybackServicePolicyKey = @"your policy key";
static NSString * const kViewControllerAccountID = @"your account id";
static NSString * const kViewControllerVideoID = @"your video id";
@interface ViewController () <BCOVPlaybackControllerDelegate>
@property (nonatomic, strong) BCOVPlaybackService *playbackService;
@property (nonatomic, strong) id<BCOVPlaybackController> playbackController;
@property (nonatomic) BCOVPUIPlayerView *playerView;
@property (nonatomic, weak) IBOutlet UIView *videoContainer;
@end
@implementation ViewController
#pragma mark Setup Methods

- (instancetype)initWithCoder:(NSCoder *)coder
{
self = [super initWithCoder:coder];
if (self)
{
		[self setup];
}
return self;
}
- (void)setup
{
_playbackController = [BCOVPlayerSDKManager.sharedManager createPlaybackController];
_playbackController.analytics.account = kViewControllerAccountID; // optional
_playbackController.delegate = self;
_playbackController.autoAdvance = YES;
_playbackController.autoPlay = YES;
_playbackService = [[BCOVPlaybackService alloc] initWithAccountId:kViewControllerAccountID policyKey:kViewControllerPlaybackServicePolicyKey];
}
- (void)viewDidLoad {
[super viewDidLoad];
// Do any additional setup after loading the view, typically from a nib.
// Set up our player view. Create with a standard VOD layout.
BCOVPUIPlayerView *playerView = [[BCOVPUIPlayerView alloc] initWithPlaybackController:self.playbackController options:nil controlsView:[BCOVPUIBasicControlView basicControlViewWithVODLayout] ];
[_videoContainer addSubview:playerView];
playerView.translatesAutoresizingMaskIntoConstraints = NO;
[NSLayoutConstraint activateConstraints:@[
[playerView.topAnchor constraintEqualToAnchor:_videoContainer.topAnchor],
[playerView.rightAnchor constraintEqualToAnchor:_videoContainer.rightAnchor],
[playerView.leftAnchor constraintEqualToAnchor:_videoContainer.leftAnchor],
[playerView.bottomAnchor constraintEqualToAnchor:_videoContainer.bottomAnchor],
]];
_playerView = playerView;
// Associate the playerView with the playback controller.
_playerView.playbackController = _playbackController;
[self requestContentFromPlaybackService];
}
- (void)requestContentFromPlaybackService
{
  NSDictionary *configuration = @{kBCOVPlaybackServiceConfigurationKeyAssetID:kViewControllerVideoID};
  [self.playbackService findVideoWithConfiguration:configuration queryParameters:nil completion:^(BCOVVideo *video, NSDictionary *jsonResponse, NSError *error) {

    if (video)
    {
        [self.playbackController setVideos:@[ video ]];
    }
    else
    {
        NSLog(@"ViewController Debug - Error retrieving video playlist: `%@`", error);
    }

  }];
}
@end
Customize the project with your values
Set the value of your Account Id, which will be sent to Brightcove in a later step.
-
Below the
#importdirectives, add your own value for your Brightcove Account Id. This will be used to register your app with Brightcove.// ** Customize these values with your own account information ** static NSString * const kViewControllerAccountID = @"your account id";
Declare properties
-
In the ViewController interface section, add the following delegates and class declarations:
- Line 14: Adds the Brightcove delegates to the
interface. - Line 16: Defines the
BCOVPlaybackController, which has methods to control playback functionality. - Line 17: Defines the player view for the Brightcove UI controls.
-
Line 18: Defines the video container view.
@interface ViewController () <BCOVPlaybackControllerDelegate> @property (nonatomic, strong) id<BCOVPlaybackController> playbackController; @property (nonatomic) BCOVPUIPlayerView *playerView; @property (nonatomic, weak) IBOutlet UIView *videoContainer; @end - Line 14: Adds the Brightcove delegates to the
Define initialization methods
-
In the ViewController implementation section, define an
initfunction which calls asetupfunction which you will define in the next step.@implementation ViewController #pragma mark Setup Methods - (instancetype)initWithCoder:(NSCoder *)coder { self = [super initWithCoder:coder]; if (self) { [self setup]; } return self; }
Set up the player
- Below the
initfunction, create a method namedsetup, which is called when the app loads.- Line 37: Creates the playback controller using a shared manager. The
BCOVPlayerSDKManagerclass is a singleton that allows you to create other objects in the SDK ecosystem. - Line 39: Registers your app with Brightcove by sending your Account Id.
-
Lines 41-43: set the delegate and turn on the autoadvance and autoplay features.
- (void)setup { _playbackController = [BCOVPlayerSDKManager.sharedManager createPlaybackController]; _playbackController.analytics.account = kViewControllerAccountID; _playbackController.delegate = self; _playbackController.autoAdvance = YES; _playbackController.autoPlay = YES; } - Line 37: Creates the playback controller using a shared manager. The
Configure the player and start playback
-
In the
viewDidLoadmethod do the following:- Lines 50-53: Create an array of video sources. You'll define the
videoWithURLfunction in the next step. - Line 56: Create the player view with a standard VOD layout.
- Line 58: Adds the player view as a subview of the main view.
- Line 59: Turn off auto-resizing mask.
- Lines 60-65: Use Auto Layout to define dynamic contraints for the player view.
- Line 66: Associates the player view with the playback controller.
- Line 69: Adds the video array to the controller's playback queue.
-
Line 74: Starts playback of the first video.
- (void)viewDidLoad { [super viewDidLoad]; // create an array of videos NSArray *videos = @[ [self videoWithURL:[NSURL URLWithString:@"https://solutions.brightcove.com/bcls/assets/videos/Great_Horned_Owl.mp4"]], [self videoWithURL:[NSURL URLWithString:@"https://solutions.brightcove.com/bcls/assets/videos/Great_Blue_Heron.mp4"]] ]; // Set up our player view. Create with a standard VOD layout. BCOVPUIPlayerView *playerView = [[BCOVPUIPlayerView alloc] initWithPlaybackController:self.playbackController options:nil controlsView:[BCOVPUIBasicControlView basicControlViewWithVODLayout] ]; [_videoContainer addSubview:playerView]; playerView.translatesAutoresizingMaskIntoConstraints = NO; [NSLayoutConstraint activateConstraints:@[ [playerView.topAnchor constraintEqualToAnchor:_videoContainer.topAnchor], [playerView.rightAnchor constraintEqualToAnchor:_videoContainer.rightAnchor], [playerView.leftAnchor constraintEqualToAnchor:_videoContainer.leftAnchor], [playerView.bottomAnchor constraintEqualToAnchor:_videoContainer.bottomAnchor], ]]; _playerView = playerView; // Associate the playerView with the playback controller. _playerView.playbackController = _playbackController; // add the video array to the controller's playback queue [self.playbackController setVideos:videos]; // play the first video [self.playbackController play]; } - Lines 50-53: Create an array of video sources. You'll define the
The rest
-
Below the
viewDidLoadfunction, create a function that sets the delivery method forBCOVSourcesthat belong to a video.- (BCOVVideo *)videoWithURL:(NSURL *)url { // set the delivery method for BCOVSources that belong to a video BCOVSource *source = [[BCOVSource alloc] initWithURL:url deliveryMethod:kBCOVSourceDeliveryHLS properties:nil]; return [[BCOVVideo alloc] initWithSource:source cuePoints:[BCOVCuePointCollection collectionWithArray:@[]] properties:@{}]; }
View the code
The View Controller implementation is now complete. Here is the full code:
//
// ViewController.m
// Simple-Video-Playback
//
// Copyright © Brightcove. All rights reserved.
//
#import "ViewController.h"
// ** Customize these values with your own account information **
static NSString * const kViewControllerAccountID = @"your account id";
@interface ViewController () <BCOVPlaybackControllerDelegate>

@property (nonatomic, strong) id<BCOVPlaybackController> playbackController;
@property (nonatomic) BCOVPUIPlayerView *playerView;
@property (nonatomic, weak) IBOutlet UIView *videoContainer;

@end
@implementation ViewController
#pragma mark Setup Methods

- (instancetype)initWithCoder:(NSCoder *)coder
{
self = [super initWithCoder:coder];
if (self)
{
	[self setup];
}
return self;
}
- (void)setup
{
_playbackController = [BCOVPlayerSDKManager.sharedManager createPlaybackController];
_playbackController.analytics.account = kViewControllerAccountID; // optional
_playbackController.delegate = self;
_playbackController.autoAdvance = YES;
_playbackController.autoPlay = YES;
}
- (void)viewDidLoad {
[super viewDidLoad];
// Do any additional setup after loading the view, typically from a nib.
// create an array of videos
NSArray *videos = @[
[self videoWithURL:[NSURL URLWithString:@"https://solutions.brightcove.com/bcls/assets/videos/Great_Horned_Owl.mp4"]],
[self videoWithURL:[NSURL URLWithString:@"https://solutions.brightcove.com/bcls/assets/videos/Great_Blue_Heron.mp4"]]
];
// Set up our player view. Create with a standard VOD layout.
BCOVPUIPlayerView *playerView = [[BCOVPUIPlayerView alloc] initWithPlaybackController:self.playbackController options:nil controlsView:[BCOVPUIBasicControlView basicControlViewWithVODLayout] ];
// add the view as a subview of the main view
[_videoContainer addSubview:playerView];
playerView.translatesAutoresizingMaskIntoConstraints = NO;
[NSLayoutConstraint activateConstraints:@[
[playerView.topAnchor constraintEqualToAnchor:_videoContainer.topAnchor],
[playerView.rightAnchor constraintEqualToAnchor:_videoContainer.rightAnchor],
[playerView.leftAnchor constraintEqualToAnchor:_videoContainer.leftAnchor],
[playerView.bottomAnchor constraintEqualToAnchor:_videoContainer.bottomAnchor],
]];
_playerView = playerView;
// Associate the playerView with the playback controller.
_playerView.playbackController = _playbackController;
// add the video array to the controller's playback queue
[self.playbackController setVideos:videos];
// play the first video
[self.playbackController play];
}
- (BCOVVideo *)videoWithURL:(NSURL *)url
{
// set the delivery method for BCOVSources that belong to a video
BCOVSource *source = [[BCOVSource alloc] initWithURL:url deliveryMethod:kBCOVSourceDeliveryHLS properties:nil];
return [[BCOVVideo alloc] initWithSource:source cuePoints:[BCOVCuePointCollection collectionWithArray:@[]] properties:@{}];
}
- (void)didReceiveMemoryWarning {
[super didReceiveMemoryWarning];
// Dispose of any resources that can be recreated.
}
@end
Connect the storyboard view
Connect the Main.storyboard view with thevideoContainer property.
-
In the Xcode, open the
Main.storyboardfile. -
In the companion view, expand the View Controller Scene and then the View Controller menu to expose the View object.
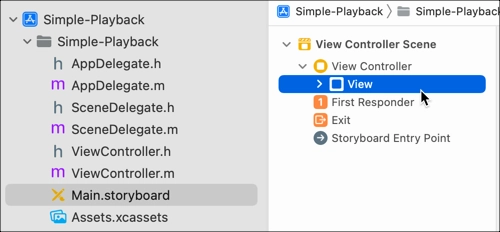
Storyboard view" -
Click Add Editor on Right, and open the
ViewController.mfile.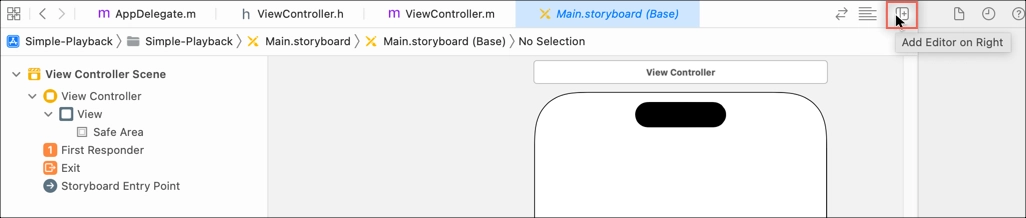
Add editor -
Select the open circle next to the
@propertyforvideoContainer, and drag it to the View object to connect these components.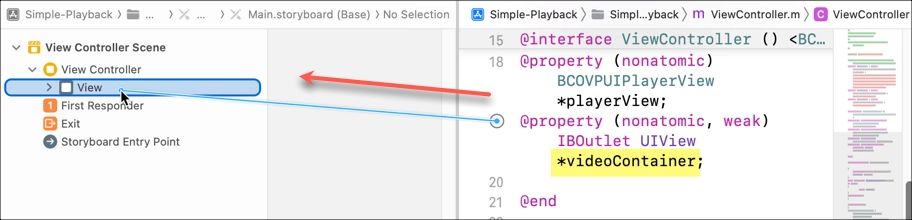
Connect the view
Manage Media Security
App Transport Security (ATS) enforces secure connections between your app and web services. With Apple's release of the iOS 9 SDK, a new feature called App Transport Security (ATS) was added.
-
One of the following situations will apply to your app:
-
By default the Brightcove Native SDK for iOS uses a source selection policy to choose HTTPS over HTTP sources, so you can build your apps with ATS enabled.
That's it, you are ready to run your app.
-
If your remote assets use HTTPS instead of HTTP sources, then you can build your apps with ATS enabled.
That's it, you are ready to run your app.
-
If you are using HTTP sources or have other HTTP calls in your app, you may encounter the following error message:
App Transport Security has blocked a cleartext HTTP (http://) resource load since it is insecure.
Temporary exceptions can be configured via your app's Info.plist file.
This means that ATS is enabled, but your system is not configured to meet the ATS requirements. To fix this situation, see the Working with App Transport Security (ATS) document.
-
Run the app
The app is ready to build and run on an iPhone, iPad or the iOS Simulator. You should be able to play the video from your Video Cloud library.
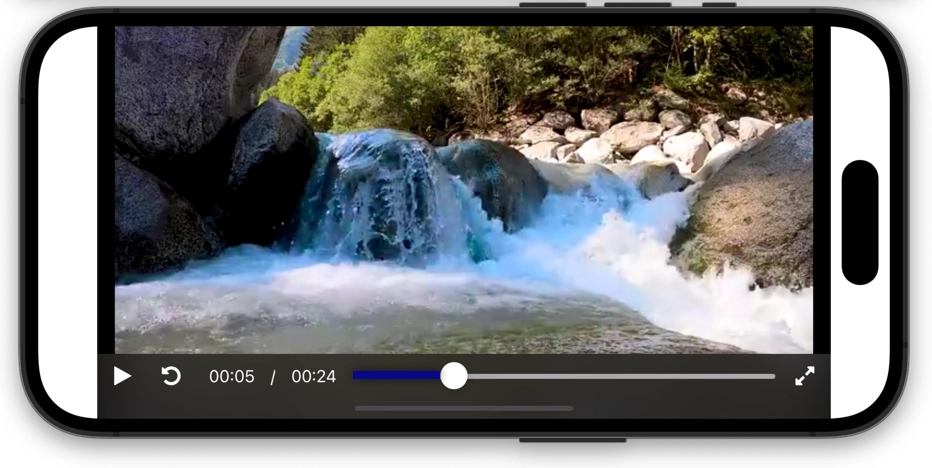
For more details, check out the Brightcove Player SDK for iOS Samples.
The app is ready to build and run on an iPhone, iPad or the iOS Simulator. You should be able to play the videos defined in your array.

For more details, check out the Brightcove Player SDK for iOS Samples.