Overview
The Brightcove Native SDK for Android provides a variety of sample apps to help you get started with your own implementations. For a complete list of samples, see the following:
If you are new to the Brightcove Native SDKs, check out the Getting Started with the Native SDKs videos.
Framework
The Android sample apps support the latest version of the Brightcove Native SDK and plugins.
It is recommended that you use the ExoPlayer 2 framework for your apps to implement the latest features available with the Native SDK. If you are not currently using this framework, see the Migrating to ExoPlayer 2 Framework document.
Installing the sample apps
The Android sample apps support the latest version of the Brightcove Native SDK and plugins.
Currently, all of the Android samples apps must be installed together as a bundle. The easiest way to get started is to import the sample apps into Android Studio. That's what we will do in the following steps.
To import the sample apps, follow these steps:
- If you don't already have it, download and install the latest version of Android Studio.
- Clone the Player samples for Android to your computer.
- In Android Studio, select Import project.
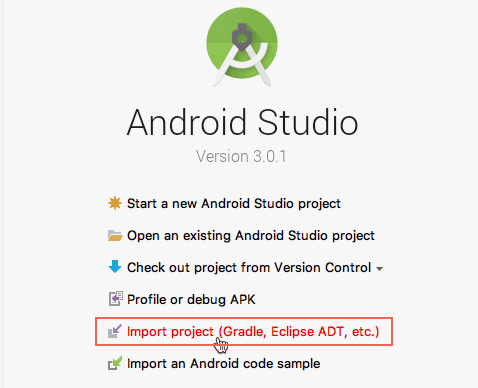
Import project -
In the file selection dialog, select the top level build.gradle file from your local cloned repository.

File selection - In Android Studio, you should see all of the sample app projects.
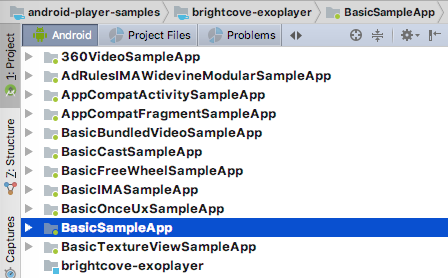
Sample app projects
Running the sample apps
The sample apps can be run using the following:
- Android Studio emulator
- Android Studio using a physical device connected to your computer
- The device must have Android OS 4.4.4 or later
- On your device, make sure USB debugging is enabled
To run a sample app, follow these steps:
- In Android Studio, in the left-side project list, expand the BasicSampleApp project.
- Expand the java folder and open the MainActivity.java file.
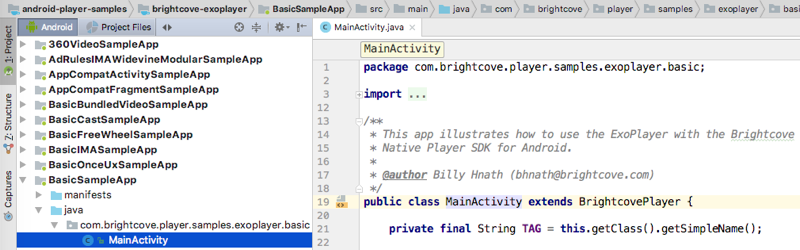
MainActivity.java file - In the project selection dropdown, select the BasicSampleApp.
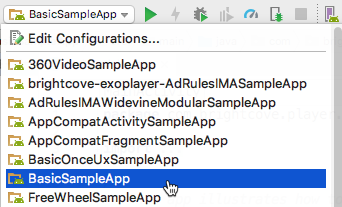
Project selection - To the right of the project selection dropdown, select the Run button.

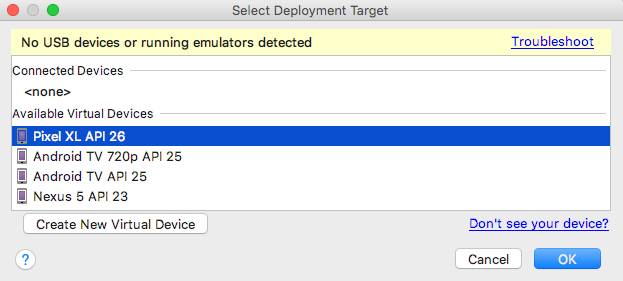
Run button - If you have a device connected to your computer, you should see it listed in the Select Deployment Target dialog. Otherwise, after you create a virtual device, you will also see it listed here. Select your device and select OK.
Select Deployment Target - You should see the app running on your device or in the emulator.
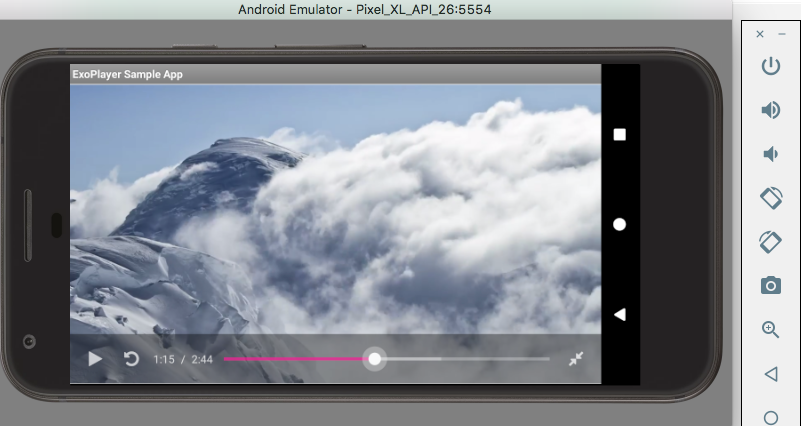
Android Studio emulator
Debugging
Android Studio has a debugger that allows you to set breakpoints, examine variables and evaluate expressions at runtime. To debug your app in the emulator, do the following:
- In Android Studio, locate the line of code where you would like to pause execution.
- In the left gutter for the line of code, click to add a breakpoint.

Breakpoint - Select the debug button to start execution.

Start debugging -
When execution pauses at your breakpoint, you will have several options to inspect variables and expressions, as well as stepping through/over/into lines of code.